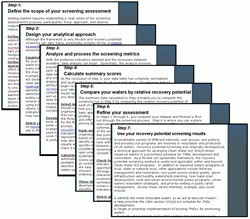
The RPS Methodology: Using the RPS Tool to Compare Watersheds and Evaluate Options
 If you want to assess and compare a group of watersheds to help you plan for impaired waters restoration, healthy waters protection, or many other types of water resource management activities, this part of the website is for you. This methodology assumes your project will use the Recovery Potential Screening (RPS) Tool (a specially modified Excel spreadsheet that includes index calculation, rank ordering, graphing and mapping capabilities) and refers to it throughout. The tabbed web pages summarize the concepts and basic steps of Recovery Potential Screening while leaving the finer details to this website’s RPS Tools section and the RPS Tool User Manual(53 pp, 31 MB)
The tabs on this web page provide a multi-step process for systematically comparing the condition and restorability of potentially large numbers (tens, hundreds or even thousands) of watersheds. Although this method provides a basic process for making a systematic, transparent and consistent comparison using the RPS Tool, it is very flexible and does not require advanced software or skills. At many points in this procedure, your own personal choices are actually required. This approach is necessary to customize the assessment for your own geographic area, environment, social settings, sources of degradation and specific restoration or protection goals.
Prospective users of RPS should note that carrying out a basic RPS screening can be done in less than an hour, even at a statewide scale, because of the pre-compiled watershed data and auto-calculating capabilities of the RPS Tool. There are times when quick, informal screening results may be all that is needed. The following discussion of RPS methods, however, assumes a more formal and involved process in which the screening purpose, participants, indicators and outputs are carefully planned and tailored to potentially very specific circumstances.
Each step is described briefly while also linking to tools, indicators and other supplemental reference information that can provide greater detail when needed. You may choose to browse all the steps at the general level first, which should take about 30 minutes. After reading through the general steps, please visit the RPS Indicators section and take some time to think carefully about the specific indicators that would be most relevant to the purpose for your screening project and your geographic area. Then, after these preparatory steps, please visit the RPS Tools section to see how the Tool itself works.
If you prefer instructions combined with detailed examples, you can download the screening example (PDF)(12 pp, 861 K) of a real assessment that followed these steps. During your project, you may also find it helpful to track steps completed with the RPS Screening Steps Checklist (PDF)(1 pp, 99 K).
